Gel electrophoresis is used in laboratories to classify and measure proteins or nucleic acids. After careful preparation, the samples are loaded onto one end of the gel, an electric current is applied, and the samples run towards the positive end of the tray. As with any scientific procedure, the possibility of human error and other sources of error exists and must be taken into consideration when interpreting the results.
1. Sample contamination
Whatever you are measuring, the first step to get accurate results is an uncontaminated sample. Take measures to avoid contamination during preparation with the use of gloves, using only sterile containers, and changing the tip of the pipette after each use. Also be careful not to contaminate your pipette by taking the sample and having it go up to the pipette.
2. Problems in the gel
Many errors are due to problems with the gel. First, an incorrect gel concentration can cause the gel to run too fast or not to run at all. Make sure you are using a concentration that is well measured and oriented towards the general sizes of the sample that you are trying to measure. For example, when working with a DNA sample, a 0.7 percent gel will allow you to efficiently order fragments that are between 800 and 10,000 base pairs in length, while smaller fragments would need a more percentage gel. high.
The gel can be compromised in other ways. Before loading the samples, make sure that the gel has no cuts or bubbles. Even a small imperfection can affect your results. Proper preparation of the gel is the key. Follow all instructions, pour slowly to avoid bubbles, and allow the gel to cool completely before loading the samples.
Finally, when a gel is established, a comb is placed to create the wells where the samples are loaded. Be careful that this comb is placed correctly in the boxes of the tray, since a comb that creates too deep or shallow wells can lead to errors.
3. Load of incorrect samples
Although it seems simple enough, loading your samples into small wells in the gel can be difficult. The most important thing is to make sure you know how much you are going to put in each well. The excess of the sample could cause them to be large spots or appear smaller than they really are; In turn, very little of the sample may be impossible to see. Also, do not pierce the gel when loading the samples, as this can cause problems, just like the other gel imperfections.
4. Problems in the electric current
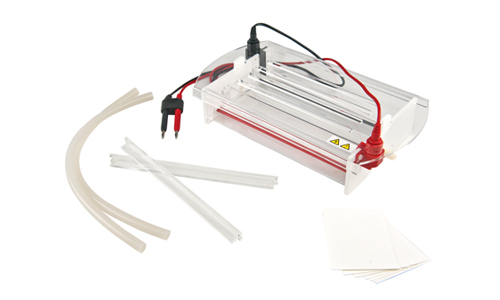
A common mistake for new students of gel electrophoresis technique is to run the gel backwards. This happens when the positive and negative connections are attached to the wrong ends of the tray. This error can be avoided by remembering that the sample will always run red, so make sure that the positive end is attached on the opposite side of the tray of the sample wells.
There are also problems with the use of incorrect voltage. Too high a tension can cause the sample to run to the other end of the gel so fast that it falls off, while a too low one can mean that the sample takes too long to run or does not run far enough to be quantified at the end .
5. Problems in visualization
If you can not see the results, it's obvious that you'll have trouble interpreting them. A sample that is too small may be difficult to visualize. Problems with visualization methods can also compromise the results. The most common methods use visible dyes or ethidium bromide (for viewing under ultraviolet light). These must be added to the gel at the correct concentrations, or visualization can be impeded.
At Kalsteinwe offer you a high quality system for your Electrophoresis runs. We invite you to take a look HERE